vue-router的两种路由模式[Hash 模式和History(Html5)模式]
AprilTong 4/1/2024 Vue
# 简单介绍
Hash 模式 通过createWebHashHistory创建,URL 中会有一个哈希字符(#),hash 虽然出现在 URL 中,但不会被包括在 HTTP 请求中,对后端没影响,改变 hash 不会重新加载页面。
HTML5 模式 通过createWebHistory创建,URL 看起来比较正常,需要 nginx 配置支持才能正常访问。
# 模拟实现
- Hash 模式 主要原理就是通过hashchange事件实现。点击查看效果 (opens new window)
<body>
    <ul>
        <!-- 定义路由 hash模式-->
        <h3>Hash Router</h3>
        <li><a href="#/home">home</a></li>
        <li><a href="#/about">about</a></li>
    </ul>
    <!-- 渲染路由对应的UI -->
    <div id="routeView"></div>
    <script>
        window.addEventListener('DOMContentLoaded', onLoad)
        window.addEventListener('hashchange', onHashChange)
        var routerView = null
        function onLoad() {
            routerView = document.querySelector('#routeView')
            onHashChange()
        }
        function onHashChange() {
            switch (location.hash) {
                case '#/home':
                    routerView.innerHTML = 'Home'
                    return
                case '#/about':
                    routerView.innerHTML = 'About'
                    return
                default:
                    return
            }
        }
    </script>
</body>
1
2
3
4
5
6
7
8
9
10
11
12
13
14
15
16
17
18
19
20
21
22
23
24
25
26
27
28
29
30
31
2
3
4
5
6
7
8
9
10
11
12
13
14
15
16
17
18
19
20
21
22
23
24
25
26
27
28
29
30
31
- History 模式 主要使用onpopstate事件函数来监听 history 路由的变化。点击查看效果 (opens new window)
<body>
    <h3>history模式 Router</h3>
    <ul>
        <li><a href="/home">home</a></li>
        <li><a href="/about">about</a></li>
        <div id="routeView"></div>
    </ul>
</body>
<script>
    // 该模式不能跨域,出现跨域,会提示
    // Uncaught DOMException: Failed to execute 'pushState' on 'History': A history state object with URL
    // 可通过http-server启动一个服务
    window.addEventListener('DOMContentLoaded', onLoad)
    window.addEventListener('propstate', onPropState)
    let routeView = null
    function onLoad() {
        routerView = document.querySelector('#routeView')
        // 拦截a标签默认点击行为
        const linkList = document.querySelectorAll('a[href]')
        linkList.forEach((el) => {
            el.addEventListener('click', function (e) {
                e.preventDefault()
                history.pushState(null, '', el.getAttribute('href'))
                onPropState()
            })
        })
    }

    // 路由变化时,根据路由渲染对应ui
    function onPropState() {
        switch (location.pathname) {
            case '/home':
                routerView.innerHTML = 'home'
                break
            case '/about':
                routerView.innerHTML = 'about'
                break
        }
    }
</script>
1
2
3
4
5
6
7
8
9
10
11
12
13
14
15
16
17
18
19
20
21
22
23
24
25
26
27
28
29
30
31
32
33
34
35
36
37
38
39
40
2
3
4
5
6
7
8
9
10
11
12
13
14
15
16
17
18
19
20
21
22
23
24
25
26
27
28
29
30
31
32
33
34
35
36
37
38
39
40
# 遇到的问题
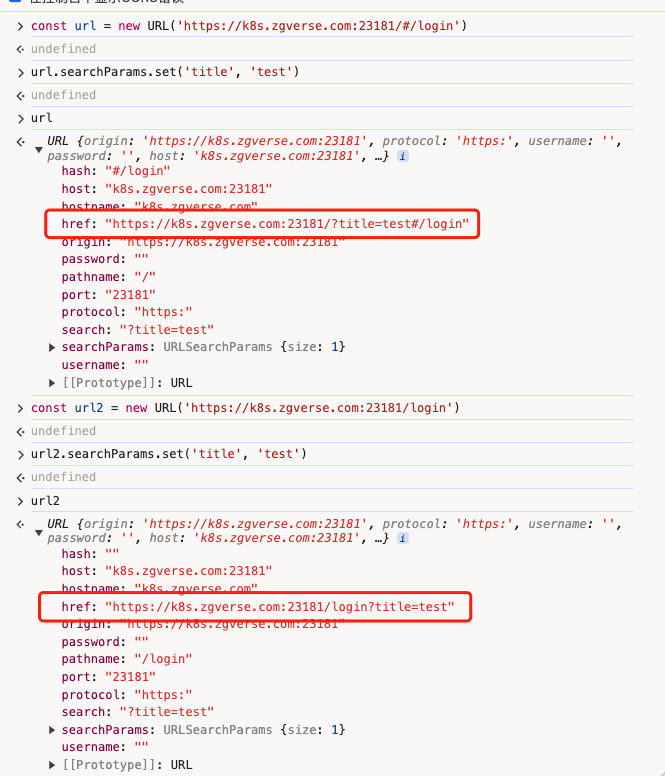
飞书扫码确认之后,内部处理之后会在 URL 上携带 Code。但两种模式携带 code 的位置不一样。 Hash 模式原来的 url 为https://XXX.com:23181/#/login,携带 code 的链接为https://XXX.com:23181/?code=XXXX&state=success_login#/login,通过 router.query 获取不到。
History 模式原来的 url 为https://XXX.com:23181/login,携带 code 的链接为https://XXX.com:23181/login?code=XXXX&state=success_login,通过 router.query 可以获取到。 但是都可以通过location.search获取到,通过以下方式解析获取到。
const params = new URLSearchParams(location.search)
const [code] = [params.get('code')]
1
2
2
如图所示,所以有个大胆猜测,飞书扫码重定向处理 URL 是不是通过url.searchParams.set方式添加上 code 参数的。
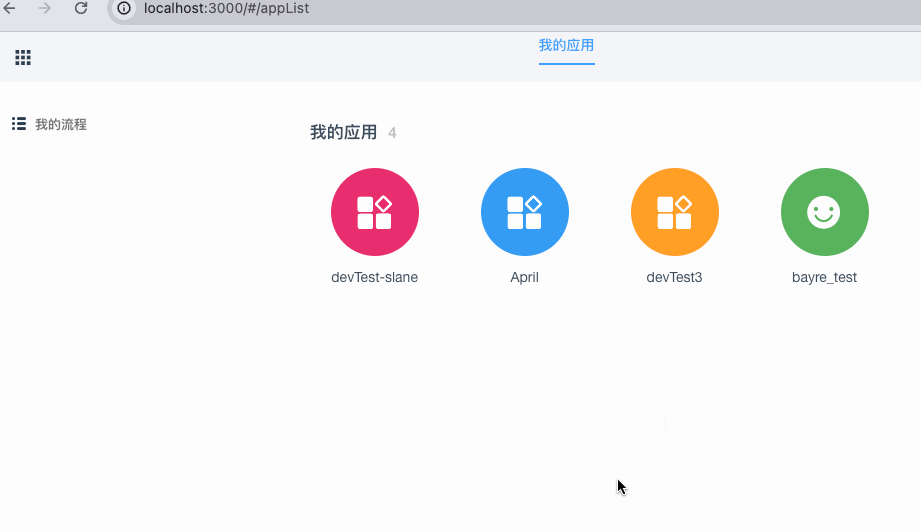
code 获取到了,又遇到新的问题了,Hash 模式通过router.push跳转页面时候,search 参数不会清空,详情如图,注意看路由变化。
那么如何清空 sarch 参数呢,我目前处理方法是通过正则给清空掉,各位大佬们还有什么更好的处理方式吗,欢迎指点。
const newUrl = url.replace(/\?code=[a-z0-9]+&state=success_login/, '')
history.replaceState({}, document.title, newUrl)
1
2
2